The Playback Console
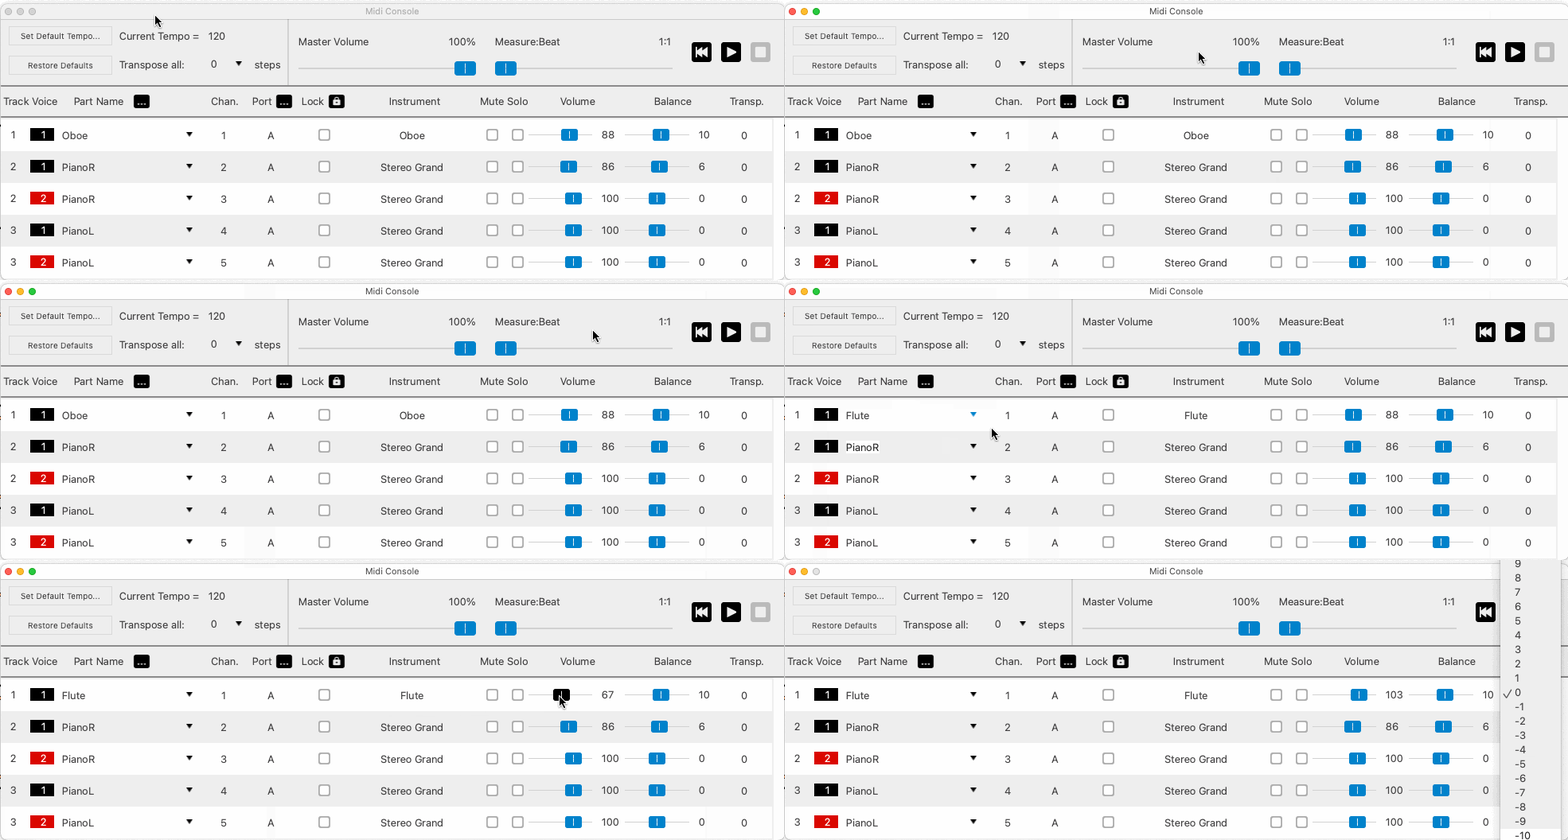
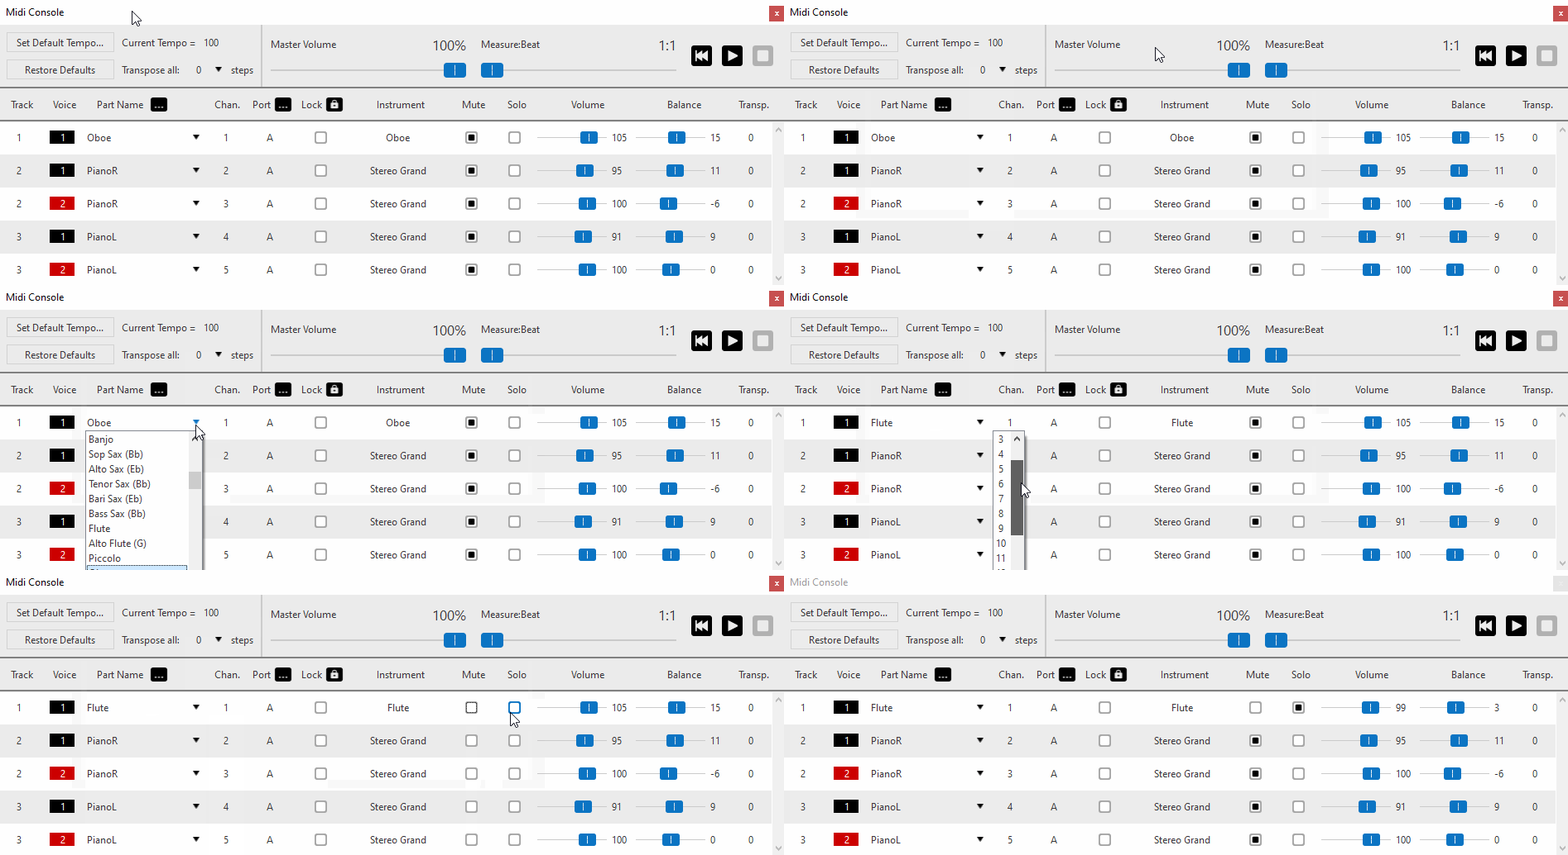
The Playback Console is the environment you want to use for assigning instrument part names and MIDI instruments to your music. Volume, Solo and Mute for individual parts (tracks) are also controlled here. It’s your musical control board.


How to get there …
There are several ways to open the Playback Console.
The button  to open the Playback Console is found on the toolbars of the Note Editor, Tools and Playback tabs.
Launche the Playback Console using 
 +
+  shortcut keys.
Select from the main menu.
1
Tempo
Default tempo for the entire score is set here. It can also be set from the EDIT > Tempo menu.
NOTE: Keep in mind that any Tempo marking in the score will over-ride the default Tempo set here.
Default tempo for the entire score is set here. It can also be set from the EDIT > Tempo menu.
NOTE: Keep in mind that any Tempo marking in the score will over-ride the default Tempo set here.
2
Transpose playback
Select any number of steps, up or down to transpose playback.
NOTE: This does NOT transpose the key signature in the notation.
Select any number of steps, up or down to transpose playback.
NOTE: This does NOT transpose the key signature in the notation.
3
Part Names List
Each part (each staff line of the system) is assigned an Instrument (Part Name) automatically out of recognition. You can choose a new part name by clicking into the named field and even rename the part simply by typing in a new name.
Each part (each staff line of the system) is assigned an Instrument (Part Name) automatically out of recognition. You can choose a new part name by clicking into the named field and even rename the part simply by typing in a new name.
4
Port
Select another Port letter which is linked to an alternative soundfont sound set or to a AU plug-in. Click on the column header name Port to open the Playback Setup dialog.
Select another Port letter which is linked to an alternative soundfont sound set or to a AU plug-in. Click on the column header name Port to open the Playback Setup dialog.
5
Measure Finder
Use this slider to relocate playback to the Measure and Beat displayed in th readout.
Use this slider to relocate playback to the Measure and Beat displayed in th readout.
6
Play…
Push to play. Push again to stop.
Push to play. Push again to stop.
7
MIDI Instrument
You can change the default MIDI instrument assigned to the part by clicking into its name field and selecting one of a 128 MIDI instruments.
You can change the default MIDI instrument assigned to the part by clicking into its name field and selecting one of a 128 MIDI instruments.
8
Mute / Solo
You can mute or solo a single part (MIDI Track) with either of these buttons.
You can mute or solo a single part (MIDI Track) with either of these buttons.
9
Transpose Part/Track playback
Select any number of steps, up or down to transpose playback of the selected part. NOTE: This does NOT affect the notation or key signature. It simply changes the pitch of the MIDI instrument.
Select any number of steps, up or down to transpose playback of the selected part. NOTE: This does NOT affect the notation or key signature. It simply changes the pitch of the MIDI instrument.
10
Changing MIDI Channels
You can change any or all MIDI Channels manually by clicking and typing in a new number. NOTE: You must press Lock in order to save the changes you made to Channel numbers.
You can change any or all MIDI Channels manually by clicking and typing in a new number. NOTE: You must press Lock in order to save the changes you made to Channel numbers.

Important info for Guitar
Main functions of the Playback Console …
1
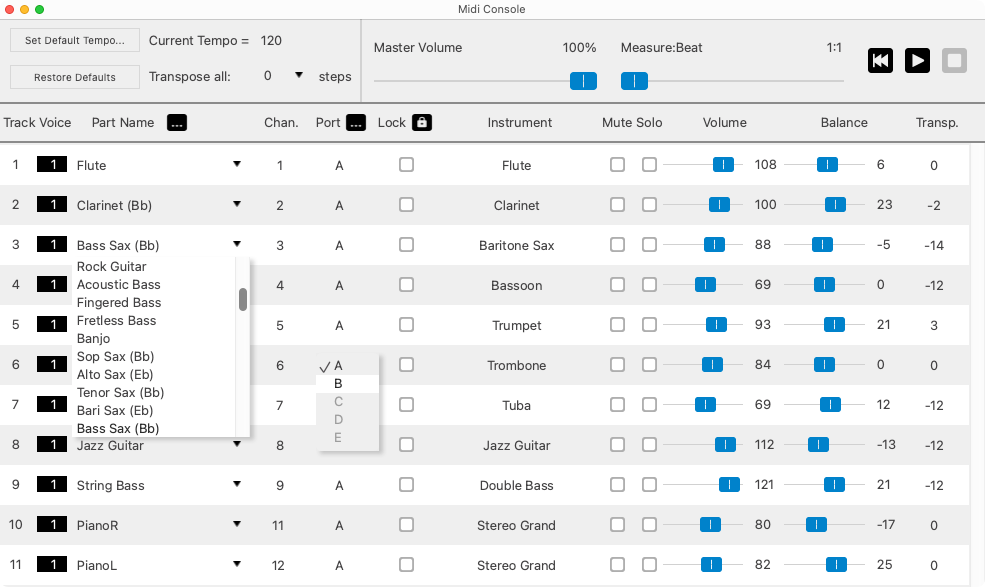
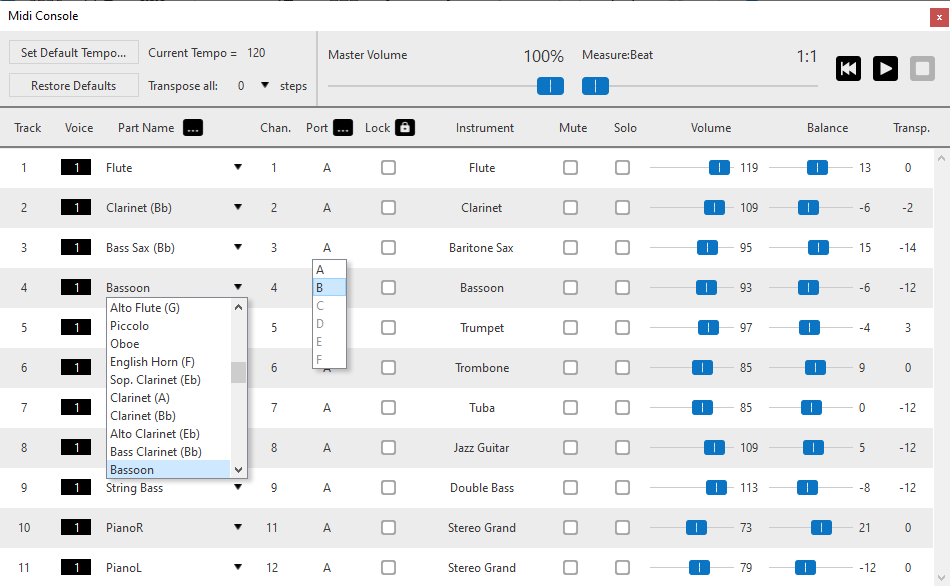
Tempo: Default tempo for the entire score is set here. It can also be set from the menu. NOTE: Keep in mind that any Tempo marking in the score will over-ride the default Tempo set here.2
Transpose playback: Select any number of steps, up or down to transpose playback. NOTE: This does NOT transpose the key signature in the notation. See Transposition3
Part Names List: Each part (each staff line of the system) is assigned an Instrument (Part Name) automatically out of recognition. You can choose a new part name by clicking into the named field and even rename the part simply by typing in a new name.4
Port: Select another Port letter which is linked to an alternative soundfont sound set or to a AUVST plug-in. Click on the column header name Port to open the Playback Setup dialog.5
Measure Finder: Use this slider to relocate playback to the Measure and Beat displayed in th readout.6
Play: Push to play. Push again to stop.7
MIDI Instrument: You can change the default MIDI instrument assigned to the part by clicking into its name field and selecting one of a 128 MIDI instruments.8
Mute / Solo: You can mute or solo a single part (MIDI Track) with either of these buttons.9
Transpose Part/Track playback: Select any number of steps, up or down to transpose playback of the selected part. NOTE: This does NOT affect the notation or key signature. It simply changes the pitch of the MIDI instrument. See Transposition10
Changing MIDI Channels: You can change any or all MIDI Channels manually by clicking and typing in a new number. NOTE: You must press Lock in order to save the changes you made to Channel numbers.